How to Use

The macOS recorder that lets you capture multi-track recordings with just one click.

Download

Download Tapelet and double click the .zip file.

Then double-click the Tapelet.dmg and drag Tapelet to your Applications folder.

Then launch 🚀

🔐 Tapelet is securely signed at Apple,  using my official Apple ID - "Tobin Harris".
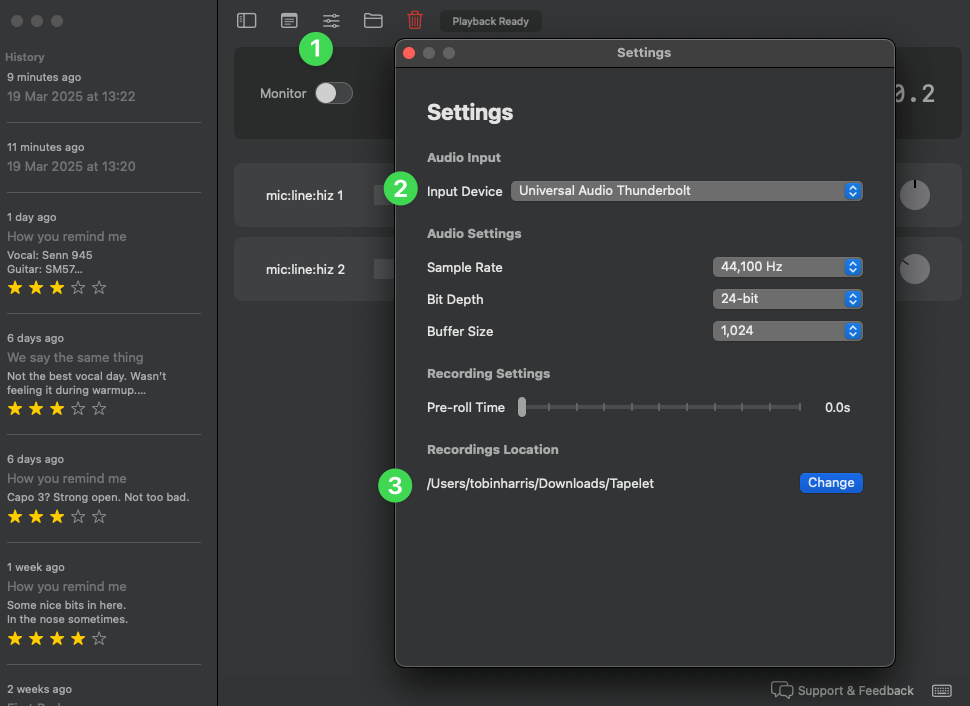
CleanShot 2025-03-20 at 07.51.41.png

One-time setup

Click the top sliders icon to open Settings.

Select your audio interface.

Then, pick where you want Tapelet to save your audio files. I suggest creating a Tapelet folder in your ~/Documents directory, but you can select anywhere.
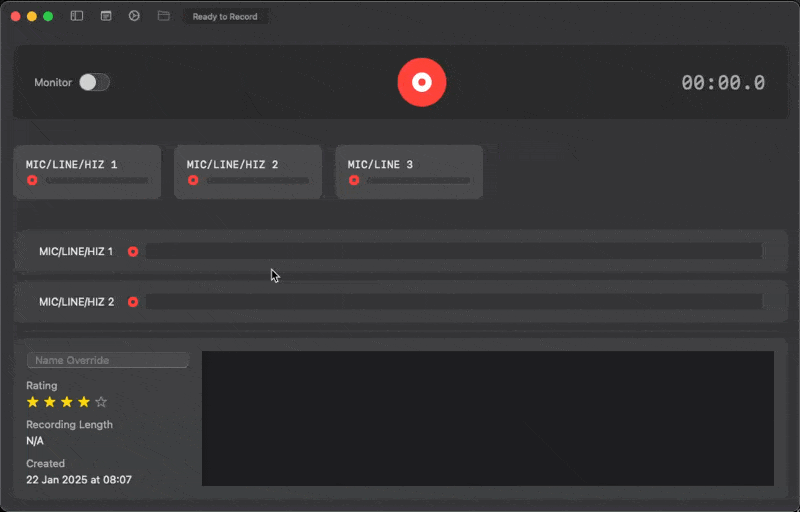
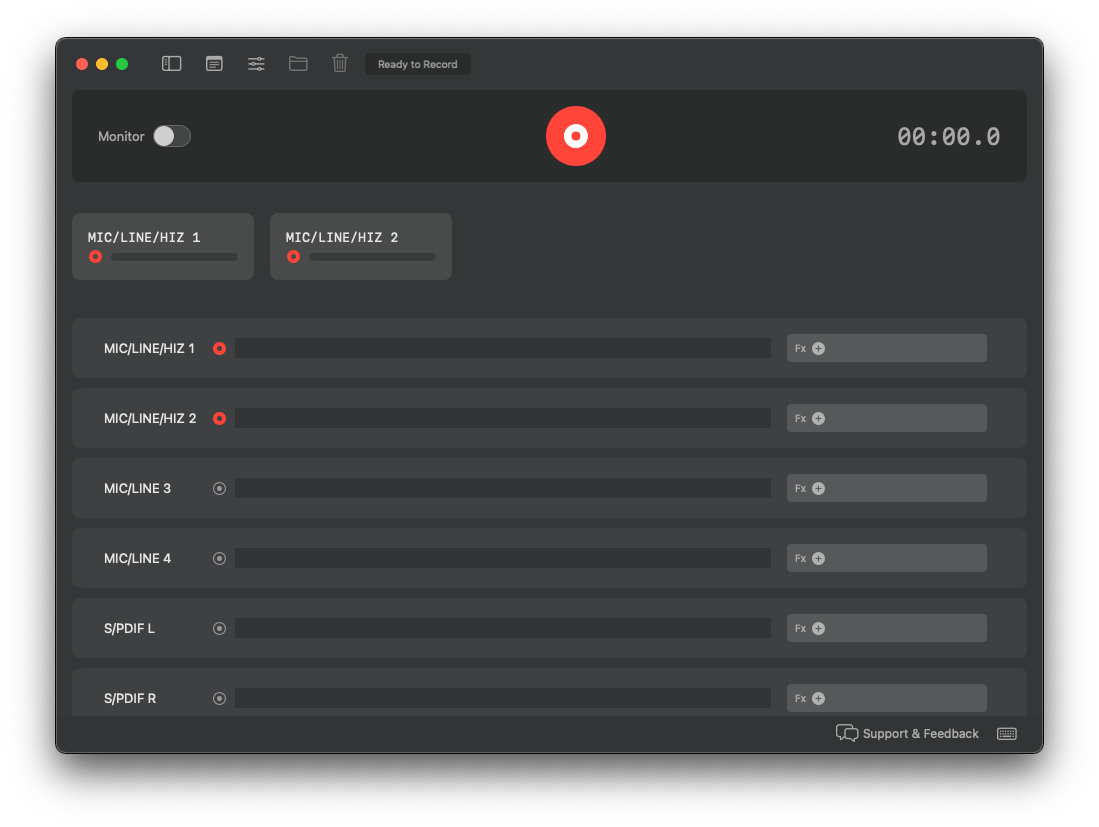
tapelet-settings.png

One-click Record

Arm your tracks.

Hit the big red button to start recording, or simply tap R. Tap it again to stop recording.

Start an instant new recording by tapping R again - just like a dictaphone or field recorder!
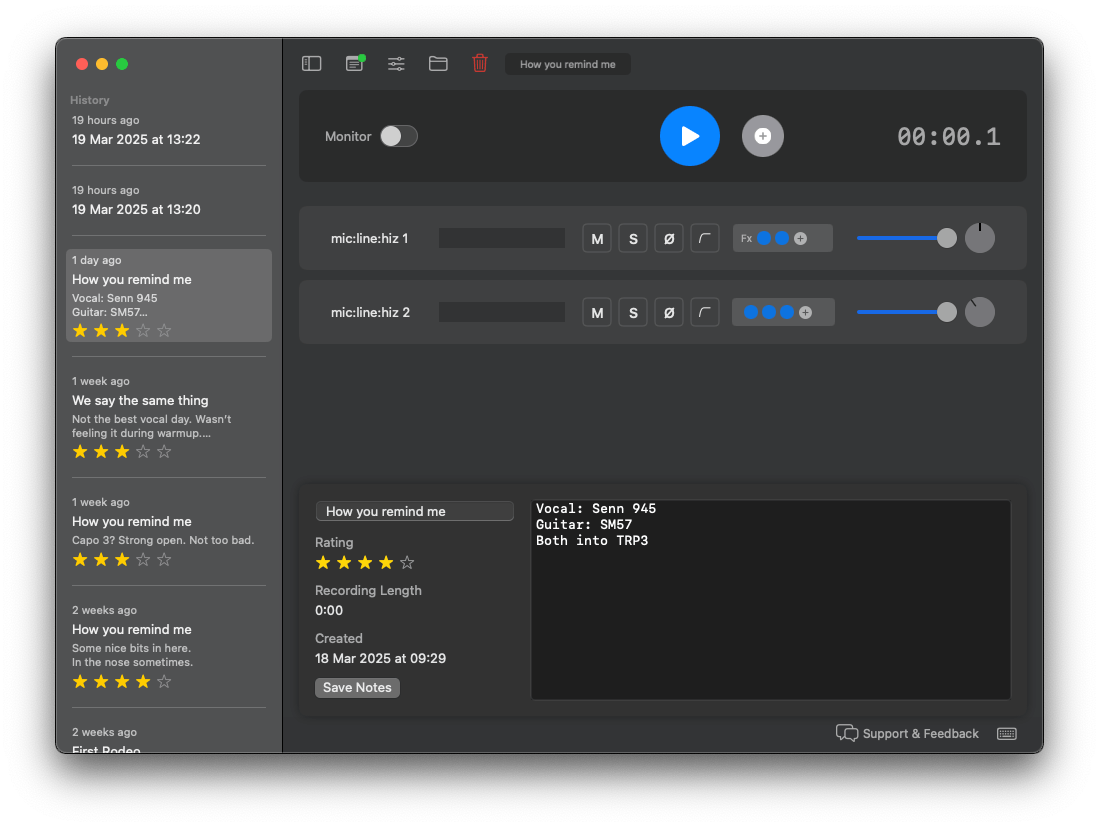
tapelet-record.png

One-click Playback

Hit space to playback to check your recording.

You can pan and adjust volume to quickly check it will mix well.

When you're ready, go back and give your recordings a rating, name and notes in by opening the history sidebar (H). Don't forget to hit Save (Cmd+S)

tapelet-playback-1.png

Quick-Drag to DAW

Tapelet is for capture and review, so you can later drag your good takes into your DAW to properly mix and produce. 

Simply tap the folder icon to reveal a .wav file for each channel you recorded, then drag those into Logic, Ableton, Reaper, ProTools or Garageband.

drag-to-daw.gif

Additional Notes

Capture ad-hoc multi-track recordings with just one click.

Optional - Join the newsletter

  • If you want emails about what's new, fill out the form on the home page.

Arming Tracks

  • Select the tracks you want to record from
  • This is remembered so you don't have to do it each time
  • Check the VU meter to ensure audio is coming through from these sources
  • For some interfaces, like UAD Apollo, you can record both wet and dry tracks by arming the AUX tracks.

Record & Playback

  • Tap R or press the record button to start recording
  • Tap R again to stop
  • Tap Space or the play button to hear the recording played back
  • WARNING: If recording UAD AUX tracks, there may be some latency which you'll need to deal with in post.

What's Next

  • You can now just hit record (R) again to start a new immediate recording
  • Or you can go and drag the recorded tracks into your DAW when it's time to mix or produce.

Keyboard Shortcuts

  • Press 'h' to reveal the history sidebar
  • Press 'n' to reveal the notes, where you can add notes and rate your recording
  • Press 'k' to show all keyboard shortcuts
  • Press Cmd+N to start a new recording

Scenarios

A singer-songwriter working on their songs

If you're working your songs with guitar and vocals and want to capture a quick idea, just tap R to start recording your take. No setup or messing around. As long as your mics and audio interface are setup, you're good to go.
Add a note to the recording and then you can quickly look at the history to find out what you did. If it's a great take you can later drag the WAV files into Logic or whatever.

Practicing lead guitar over a YouTube backing track

If you're practicing lead guitar over YouTube backing tracks, or some other source on your computer, just hit R to capture your idea. You'll first need to arm the MON tracks (assuming your audio interface supports this). You can also capture the DI guitar signal as a separate track from whatever channel you've DI'd into.

Recording a band practice

If you need to capture a 2-hour practice with 8 inputs for different mics/instruments, just arm all those tracks, then hit R in Tapelet. Your band practice is captures as separate WAV files for each input you armed.

Testing microphone placements

If you're selecting the right position in the room you can quickly capture recordings for each position. Just tap R to start, R to stop, add a quick note about what the placement etc, then R to start the next recording. It's super quick to create a series of recordings when you're trying out different stuff.

Testing different microphones for a source

If you're trying out different mics, you can quickly capture a recording of each one by just tapping R to start/stop, then adding a note about the mic, then tap R again to move on to the next mic/recording.

Cookie Settings
This website uses cookies

Cookie Settings

We use cookies to improve user experience. Choose what cookie categories you allow us to use. You can read more about our Cookie Policy by clicking on Cookie Policy below.

These cookies enable strictly necessary cookies for security, language support and verification of identity. These cookies can’t be disabled.

These cookies collect data to remember choices users make to improve and give a better user experience. Disabling can cause some parts of the site to not work properly.

These cookies help us to understand how visitors interact with our website, help us measure and analyze traffic to improve our service.

These cookies help us to better deliver marketing content and customized ads.